...return to 'Keyboard And Mouse'?
...backward to 'Live Preview'?


Keyboard Mode Switching
Switching the modes is very easy to do, and it can be done through the keyboard, or through the menu, although it is prefered to use the keyboard. There are not too many keys to remember in order to be able to change the modes and get the best use from the program.


For the Mouse
From the perspective of using the mouse only, the mode keys will give you a different visual appearance for the parts. The draggable edges will be in different locations on the parts depending on the mode. So, you can then choose the mode that you like the best. Maybe you will choose the mode that doesn't block the view of the contents inside of the part, D, or maybe you will choose the mode that prevents the parts from being resized, Z.
For the Keyboard
When you consider changing the mode, from the perspective of using the keyboard, you will find that the change in the program is very important, and the visual indication becoming changed is only half of the story. Depending on which mode we have chosen, the actions performed by the H, J, K, and L keys will change significantly. The behaviour of the four arrow keys, however, will remain the same, regardless of the mode.
When the mode is changed, this can also affect the behaviour of the mouse. That is why it is important to know what the modes are, and how they can be changed.

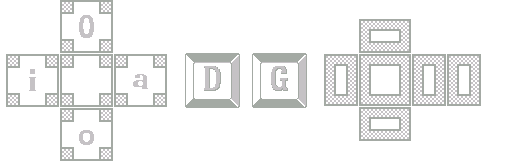
The D, G, E, T, and Z Keys
Each of these keys will enable it's own special mode. The two modes that are the most similar to each other are D and G. The E, T, and Z keys will all have a special effect on the use of the H, J, K, and L keys on the keyboard. It is important to point out that the T key is unique because it is the only mode that changes the mouse action. So, let's talk about the T key first.

The T Key Puts the Program Into Colouration Mode
When this mode is used the action of the mouse will be completely changed. When this key is used, it sets up a special mode that lets us paint the parts using one of three colours. This program uses a tripartite colouration system which helps with part selection. Every part in the program is in exactly one of these three groups.
From the mouse, we can apply colours to the parts by holding CTRL, SHIFT, or CTRL + SHIFT. Then we must click, or drag across some parts to apply the new colouration.
The G Key Puts Us Back Into Normal Mode
When we have G mode enabled, we can do all of the normal things with the mouse, such as: Moving parts around the screen, and resizing parts from their edges. I you are ever unsure about which mode you are in, you can safely press the G key because it has absolutely no other effect other than changing the program into G mode.
D Mode Makes Duplicates
The main difference between D mode and G mode is that D allows us to make duplicate parts more easily from the keyboard. From the perspective of using the mouse, we only see that the hotspots for resizing the parts are different but, from the keyboard perspective, there is a noticable difference in behaviour when using the A, I, and O keys. These keys make new parts, and in the case of D mode, they make new duplicates, which includes what is inside of the part, and the dimensions of the outside of the part.

E Mode Resizes the Parts From the Edge
Pressing the E key the first time will put us into edge move mode, and pressing E again will then toggle between the target edges. This mode does not change the mouse action very much but, it has a strong effect on the behaviour of the H, J, K, and L keys on the keyboard. In this mode, those keys are used for resizing the parts from the edge.
This is mostly a keyboard mode because it allows us to resize the parts very quickly, using the keyboard grid increment. Other than the visuals, the mouse action will not be changed.

Z Mode Changes the Z-Index
When we press the Z key, more than one thing is happening. We are putting the keyboard into z-index mode, and then H, J, K, and L will be used to change the z-index of the parts.
The other thing that will happen is that, simply by pressing the Z key, we will set up an automatic global z-index. If the z-index was previously cleared, we will see a difference immediately when we move parts around the screen. They won't shuffle themselves anymore but, will instead be much better behaved.
If we instead press SHIFT + Z, then we will set up a different style of z-index management in the program. Our z-index will now be split up into the different tripartite colouration groups, which will now be arranged as a foreground, middleground, and background. That is to say, each colouration group will be stuck together with the members of it's own group in terms of z-index. Just test it out, and you will see what I mean. This is a very useful feature, and is purposefully matched with a similar feature for the document ordering system, which uses the V key. It has both global and tripartite options as well.