...return to 'Keyboard And Mouse'?
...backward to 'Keyboard Mode Switching'?


Movement keys

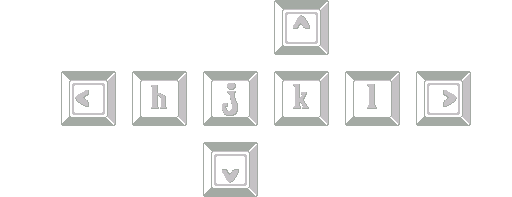
H, J, K, L, and the Arrow Keys
These are the main keys which, usually, control the movement of parts from the keyboard. Most of the time these keys will only move parts around the keyboard but, depending on the keyboard mode that is used, H, J, K, and L will sometimes perform different actions. The arrow keys, however, will not be affected by the mode.
The Arrow Keys Are Unique

The Arrow Keys Align Parts
The arrow keys on the keyboard are able to move parts around the screen but, the first thing that they do is align the part to the grid. If the part is not aligned with the current grid increment, the first move that is made with the arrow keys will align the part with the grid in the direction of travel.
Even if we prefer to mostly use the mouse for our work, it will still be very beneficial to make use of the arrow keys to make the alignment with the grid. Another thing to point out which will aid in alignment of the part edges is that we can doubleclick the part edges. If the part is not aligned with the grid on the edge, that edge will move to the grid line after doubleclicking it.
The Arrow Keys Perform Rotations
While we are holding down the CTRL key, the arrow keys will perform some part rotations. This is discussed further in the section regarding part rotations.
Hold Shift to Move Multiple Parts
While we are holding down the SHIFT key, the arrow keys will now move an entire colour group. The alignment will be synchronized from the active part. This makes it possible to move things in an interesting way, or to make the consideration of an offset.
H, J, K, and L Change According to the Mode

G and D Modes
When we are using these keys, we must take care to know which mode we are using because the actions depend on the mode. When we are using G or D, H-J-K-L will move the part around the screen. While we are holding the SHIFT key, we will move an entire colour group.
E Mode
When we are in E mode, the actions are different, and we will instead be changing the size of the part from the edges. We can switch between the edges by pressing E again. While holding SHIFT, we move two opposite edges at once.
Z Mode
While in Z mode, we will be able to move the part in the sense of the stacking order, which is commonly known as the z-index. J will make the part further to the back, and K will make the part come towards the front. H will bring the part to the highest position, and L will send the part to the lowest position.
While holding SHIFT, we will perform nearly the same actions, with the difference being that the action will be performed with respect of the colour group. For example, we will make the part the highest, lowest, or move it up or down in the colour group only. We will also set our z-index management to be of the tripartite type by doing this. At present there is only one way to 'scrub' the z-index, and it is through the button in the menu.
T Mode
For the sake of completeness: T mode will cause J and K to change the part colouration and H and L to then paint left and right. This feature might be removed or rearranged in future so that we can put something more useful on that key. The best way to apply colourations is with the mouse. If you do feel inclined to try to do it from the keyboard, you must hold SHIFT and then use H or L to paint. Be sure to press V first to apply a global document flow, otherwise you will move only within a single colour group. It's confusing, and that is why this is likely to be changed.